Use only TIFF images captured directly by the camera.
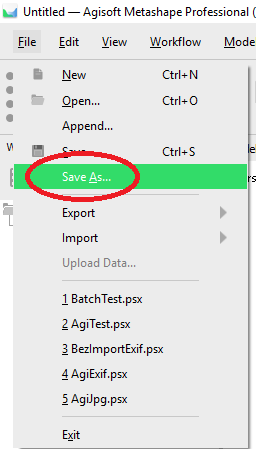
1. First, save the project through File->Save As.
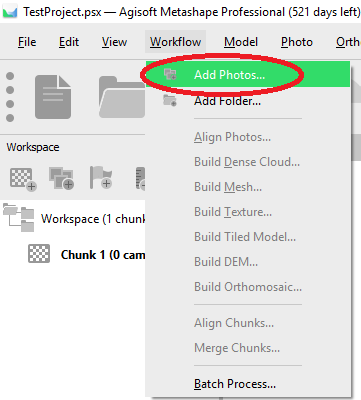
2. Add photos to the project through the Workflow menu.
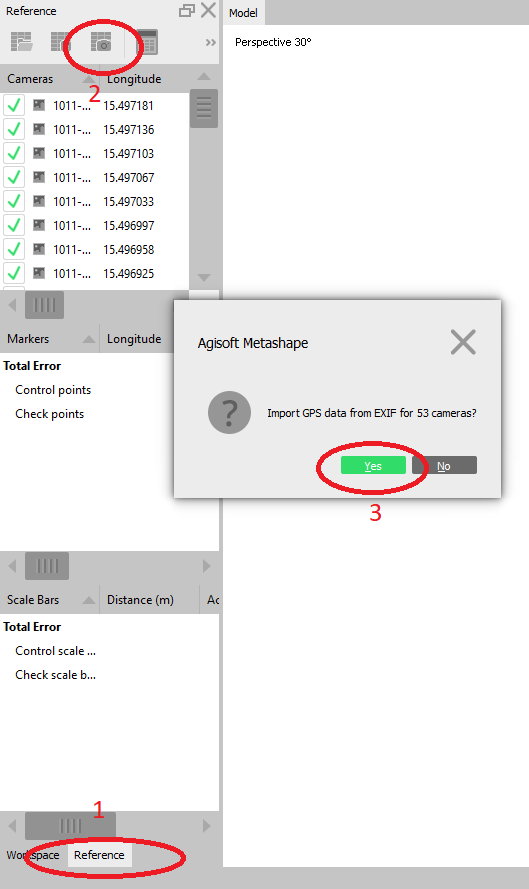
3. Switch to the Reference pane in the bottom left corner and click the „Import EXIF“ button.
4. Go back to the Workflow pane in the bottom left corner and then click the Workflow menu again and choose Align Photos.
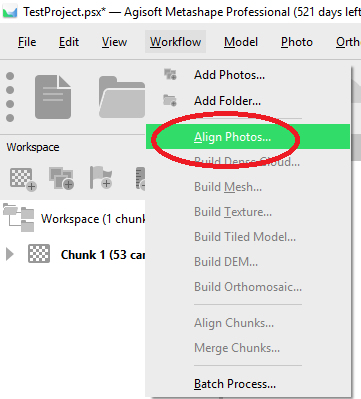
5. Set the accuracy to High and check that both available checkboxes are checked. Hit OK.

6. If some of the images failed to align, you can try again with a different accuracy or manually remove the bad images (you will see „NA“ next to the name of the picture). If you do this, make sure to also check the “Reset current alignment” checkbox”
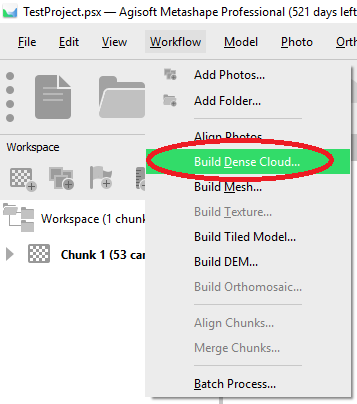
7. Again in the Workflow menu, click „Build Dense Cloud“.
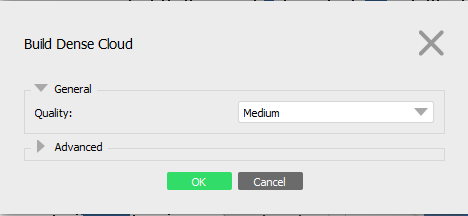
8. Check that the Quality is set to Medium and hit OK.
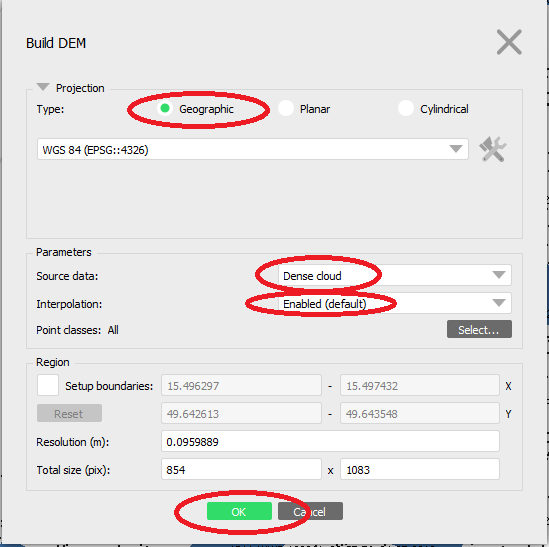
9. In the Workflow menu, click „Build DEM“.
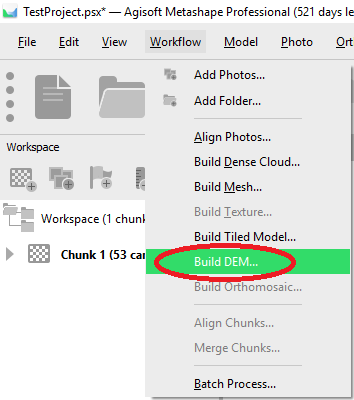
10. Check that Type is Geographic, Source Data is Dense cloud, Interpolation is Enabled and hit OK.
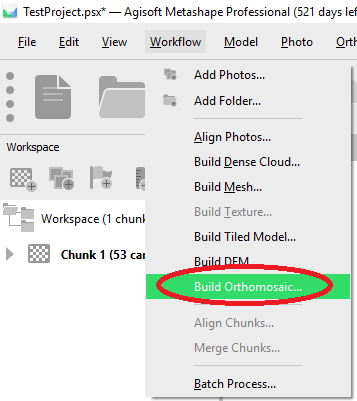
11. Now choose the „Build Orthomosaic“ button in Workflow.
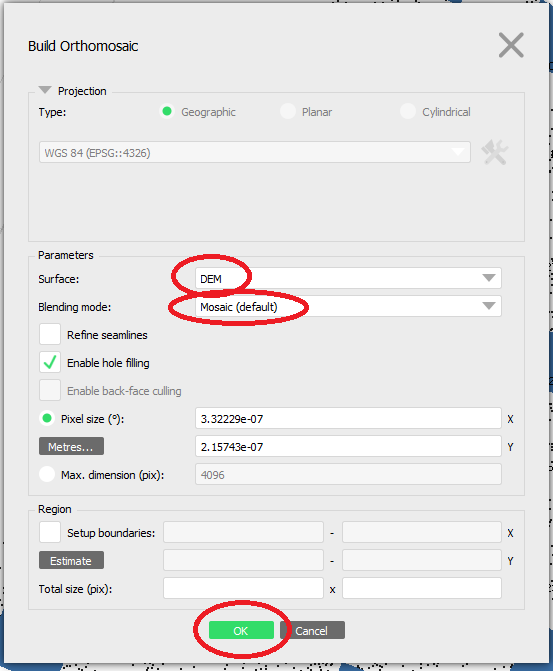
12. Check that Surface is DEM, Blending mode is Mosaic and hit OK. All the steps described above can be automated using the Workflow->Batch Process feature, simply choose the same parameters and come back to a complete orthomosaic.
13. To access your newly created orthomosaic, click the Arrow next to the Chunk name, double-click the Orthomosaic and switch to the Ortho window.
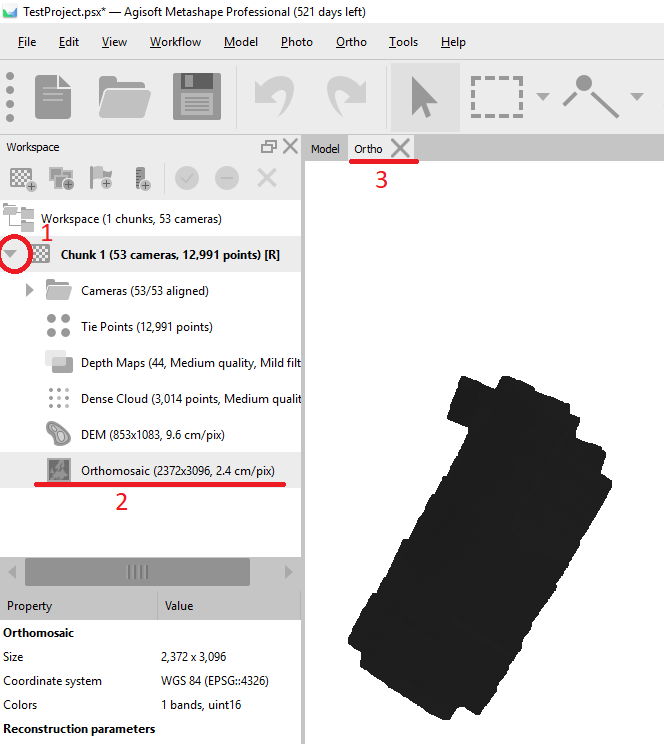
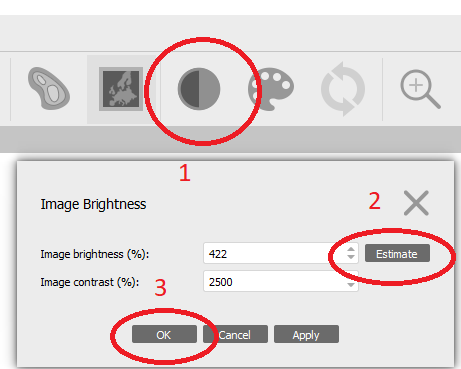
14. It is possible that your orthomosaic has a bad brightness just like ours in the previous picture. To fix this, click the Brightness icon, then click Estimate and click OK. The orthomosaic should be grayscaled in a normal range now.
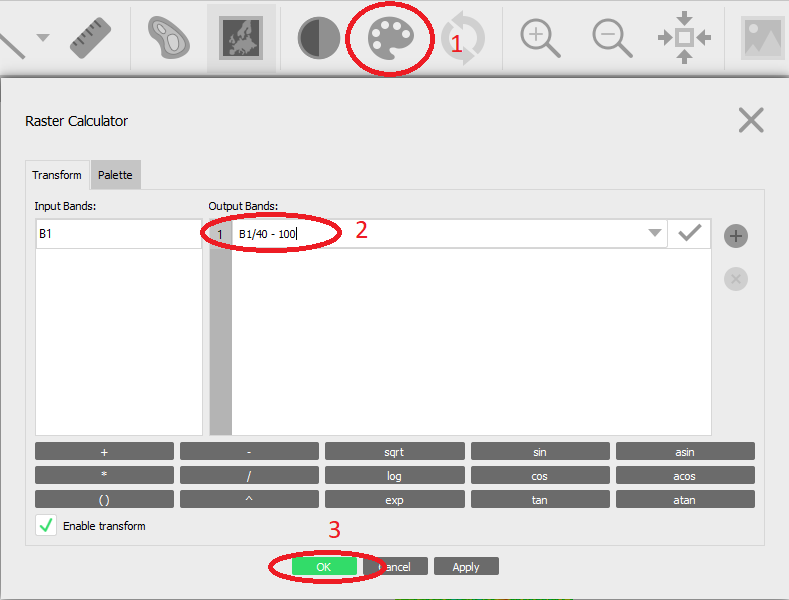
15. To apply our formula (to see the coloured orthomosaic), click the Palette icon, type in „B1/40 – 100“ into the Output Bands window and hit OK. Open the window again and switch to the Palette card for further customizations. In case you captured data in the JPEG format and converted it via ThermoFormat, use „0.04*B1 – 273.15“.
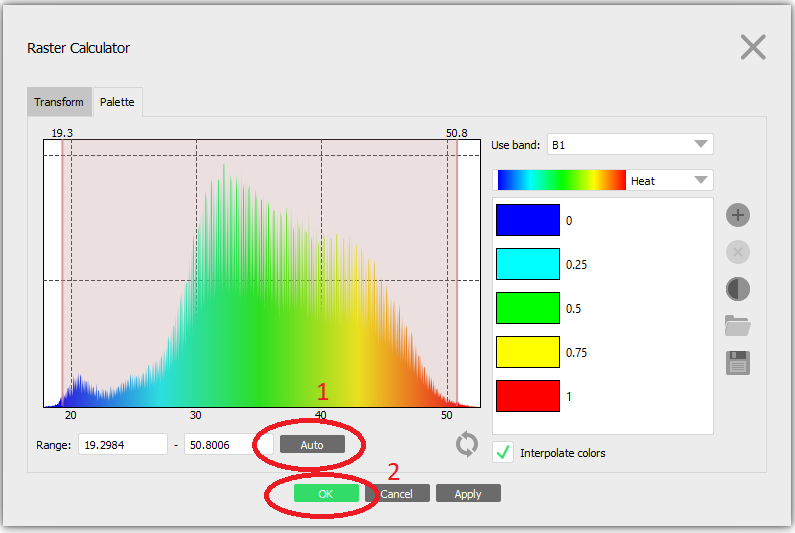
16. After choosing a palette, click the Auto button in Range and hit OK.
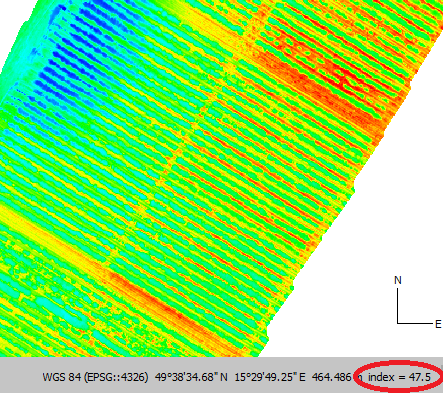
17. When you mouse over a certain pixel, you can see its coordinates and altitude above the sea level in the bottom right corner, most importantly the temperature of the particular pixel described as“index=“
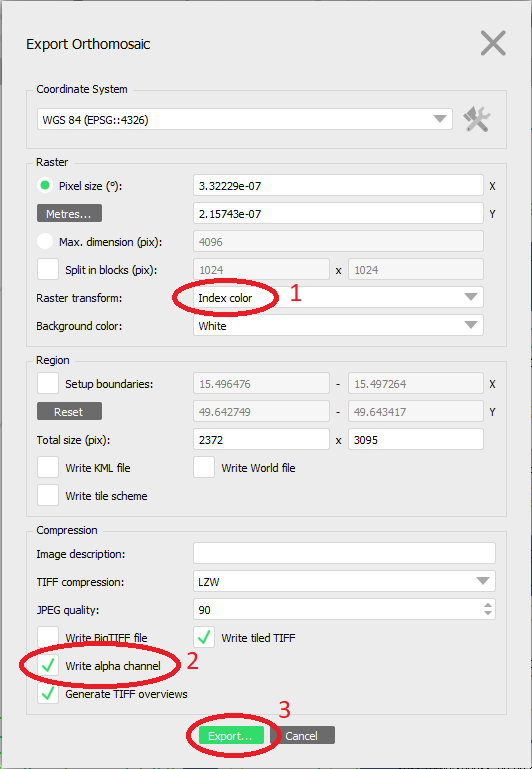
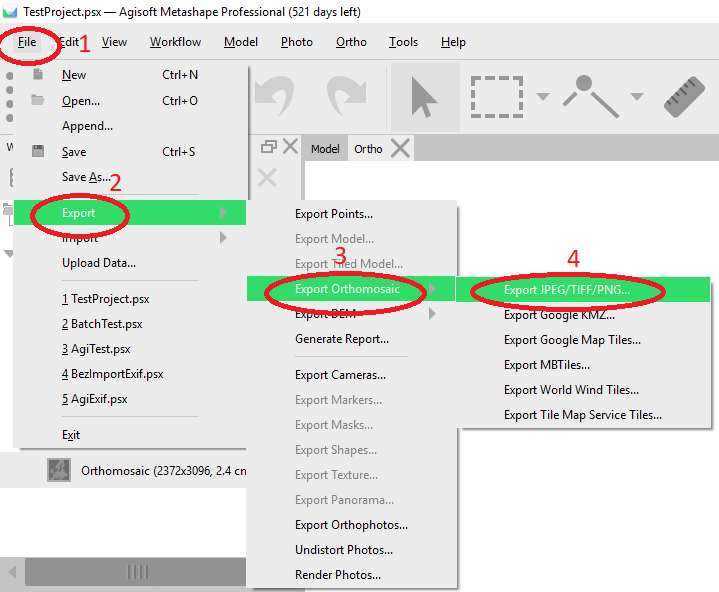
18. To export your created orthomosaic, go to the File menu, click Export->Export Orthomosaic->Export JPEG/TIFF/PNG.
19. In the Raster transform section, choose Index Color, make sure the „Write alpha channel“ is checked and hit Export. Then after you write a name, make sure you are exporting in the TIF (TIFF) format. Alternatively, if you didn’t create the colored orthomosaic, choose „Index Value“ instead of „Index Color“.